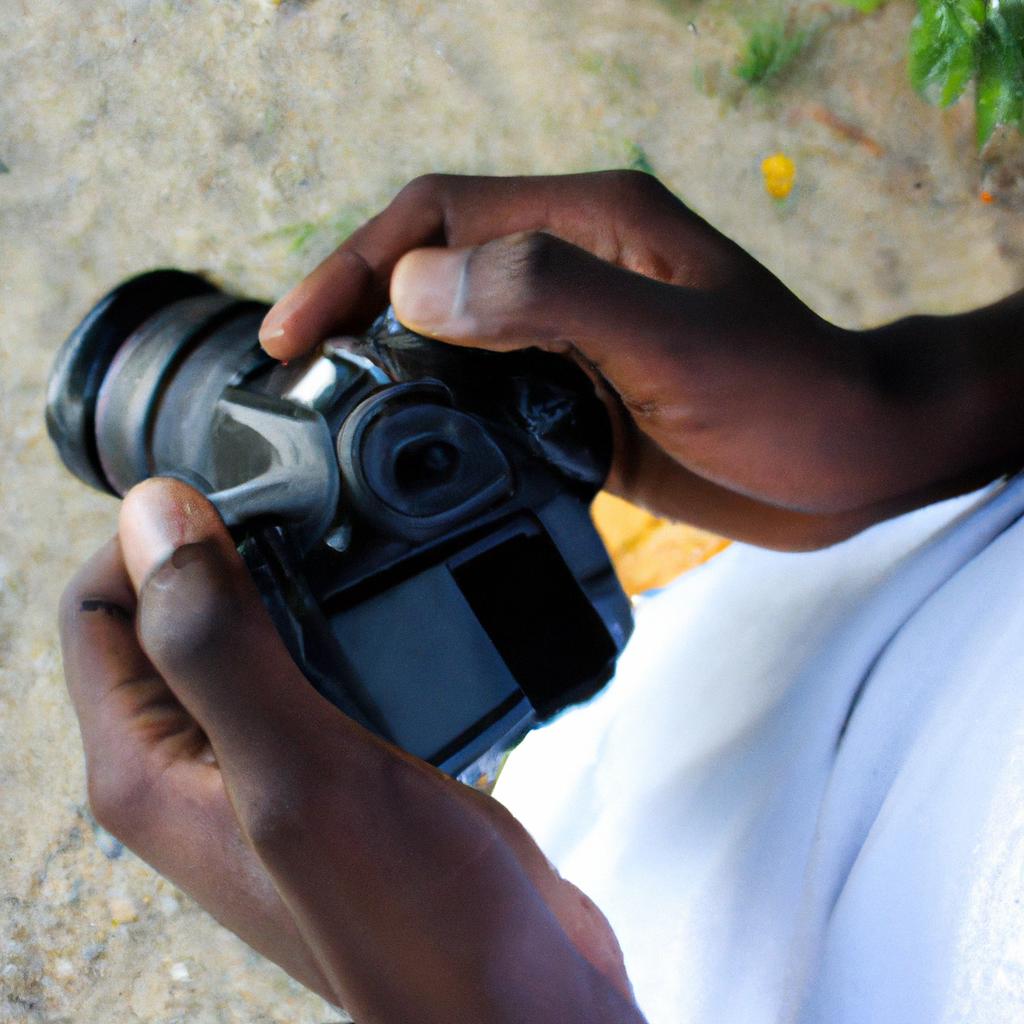
Music photography is a unique genre that requires a deep understanding of camera settings to capture dynamic and compelling images. In this article, we will explore the essential camera settings for music photographers, providing valuable insights into how to achieve stunning results in various concert scenarios. To illustrate these concepts, let’s consider the hypothetical scenario of capturing live shots at an energetic rock concert.
To effectively capture the essence of a live rock performance, music photographers must master their camera settings. One crucial aspect is selecting the appropriate aperture setting. By adjusting the aperture, photographers can control the depth of field, allowing them to isolate specific subjects amidst a chaotic stage environment. For example, when shooting a lead guitarist in action during a guitar solo, using a wide aperture like f/2.8 would create a shallow depth of field, resulting in a blurred background while maintaining sharp focus on the musician’s expressive face and nimble fingers. This technique adds visual impact by drawing attention to the main subject and enhancing the overall composition.
Another vital consideration for music photographers is selecting suitable shutter speed settings. The fast-paced nature of concerts demands quick reflexes and precise timing to freeze moments filled with energy and movement. Using high shutter speeds such as 1/1000th of a second or higher enables photographers to capture crisp and sharp images of musicians in action, freezing their movements mid-performance. This is especially important when capturing drummers or guitarists strumming vigorously, as it allows photographers to showcase the intensity and passion of the live performance.
Additionally, fast shutter speeds are essential for photographing stage lighting effects, such as strobes or lasers. By using a high shutter speed, photographers can effectively freeze these dynamic lighting elements, creating visually striking images that reflect the atmosphere of the concert.
In low-light concert environments, music photographers often face the challenge of balancing exposure while minimizing image noise. To tackle this issue, understanding ISO settings is crucial. Increasing the ISO sensitivity allows photographers to capture more light in darker conditions, but it also introduces digital noise into the image. Finding the right balance between ISO and image noise is key to achieving well-exposed shots without sacrificing image quality.
It’s worth noting that different cameras handle high ISO settings differently, so experimenting with your specific camera model will help you determine its optimal ISO range for concert photography. Generally, starting with an ISO setting around 1600-3200 should provide a good baseline for most situations.
Lastly, when shooting concerts with constantly changing lighting conditions, using spot metering mode can be advantageous. Spot Metering allows photographers to measure exposure based on a small area within the frame rather than relying on average scene brightness. By selecting a spot metering mode and focusing on a well-lit subject’s face or instrument, photographers can ensure accurate exposure even amidst challenging lighting scenarios.
Remember that mastering camera settings alone won’t guarantee exceptional music photography. Practice and experience are essential components for honing your skills in capturing those decisive moments and conveying the energy and emotion of live performances through your images. So grab your camera and dive into the exciting world of music photography!
Metering Mode Explained
Imagine you are photographing a live music performance in a dimly lit venue. You want to capture the energy and emotion of the musicians on stage, but you’re struggling to find the right camera settings. This is where understanding metering mode can make all the difference.
Metering mode refers to how your camera measures light and determines exposure settings for a given scene. It helps you achieve accurate exposures by analyzing the brightness and contrast of different areas within the frame. Let’s explore three common metering modes used by music photographers:
-
Evaluative Metering: Also known as matrix or multi-zone metering, this mode divides the frame into multiple zones and evaluates each area independently. It takes into account various factors such as subject distance, color, and composition to determine the optimal exposure across different lighting conditions. For example, when shooting a musician under spotlights with varying intensities, evaluative metering can help balance out their skin tone while retaining detail in bright highlights.
-
Center-Weighted Average Metering: In this mode, emphasis is placed on the central portion of the frame while still considering other areas. It provides more importance to subjects at or near the center and allows for reliable exposure measurements even in challenging lighting situations. Center-weighted average metering is particularly useful when capturing solo performers or close-up shots that require precise control over exposure.
-
Spot Metering: Spot metering measures only a small area (typically around 2-5% of the frame) centered on your focus point. It disregards other parts of the scene, providing an accurate reading specifically for that selected spot. This mode is ideal for high-contrast scenarios where you need to expose correctly for a specific element without being influenced by surrounding dark or bright areas—like highlighting intricate guitar fingerings against a dark background.
To illustrate these differences further, consider this scenario: A guitarist is performing under a spotlight while surrounded by dimly lit bandmates. Using evaluative metering, the camera will consider the overall scene and ensure proper exposure for both the brightly lit subject and the darker background. However, if you switch to spot metering, your focus will be solely on capturing accurate details of the guitarist’s face or hands.
| Metering Mode | Strengths | Limitations |
|---|---|---|
| Evaluative | Balanced exposures | May average extremes |
| Center-Weighted Average | Reliable measurements | Less control over peripheral areas |
| Spot | Precise targeting | Risk of under/overexposing other parts |
Understanding and utilizing different metering modes can greatly enhance your music photography skills. By mastering these technical elements, you’ll have greater control over how light interacts with your camera and ultimately capture stunning images that convey the atmosphere and emotions of live performances.
Understanding Aperture
Building on our understanding of metering mode, let’s now delve into another crucial aspect of camera settings for music photographers: aperture. Understanding how aperture works is essential for achieving the desired depth of field and controlling the amount of light entering your camera.
Aperture refers to the size of the opening in the lens through which light passes onto the image sensor. It is measured in f-stops, with a lower number indicating a wider opening and a higher number denoting a narrower one. For example, an aperture setting of f/2.8 allows more light to enter than an aperture setting of f/16.
To illustrate its significance, consider this scenario: You are photographing a live concert where you want to capture both sharp images of musicians on stage and create a beautiful bokeh effect by blurring out the background. In this case, you would need to use a wide aperture like f/1.8 or f/2.8 to achieve shallow depth of field, isolating your subjects from their surroundings while keeping them sharply focused.
Understanding Aperture:
- Wide apertures (low f-stop numbers) allow more light into the camera, making them ideal for low-light situations.
- Narrow apertures (high f-stop numbers) restrict the amount of light entering your camera but provide greater depth of field, ensuring that objects at different distances appear sharper.
- Choosing the right aperture depends on your creative vision and lighting conditions; experiment with different settings to achieve desired effects.
- Keep in mind that using extremely wide apertures may result in softer focus areas or vignetting towards the edges of your frame.
Now that we have explored aperture settings and their impact on photography outcomes, let’s move forward to examine another critical factor in camera settings: ISO sensitivity.
The Role of ISO in Photography
Understanding Aperture plays a crucial role in capturing high-quality photographs. As we delve further into the technical aspects of photography, it is important to explore another key component: ISO. By comprehending ISO and its function within the realm of photography, music photographers can enhance their skills and produce stunning images.
To illustrate the significance of ISO, let’s consider a hypothetical scenario. Imagine you are photographing a concert in a dimly lit venue with fast-paced movements on stage. In such situations, a higher ISO setting becomes essential as it allows your camera to capture more light. This results in brighter images even when shooting in low-light conditions.
Here are four key points that highlight the importance of ISO:
- Sensitivity to Light: ISO determines how sensitive your camera sensor is to incoming light. A higher ISO value increases sensitivity but also introduces noise or graininess.
- Low vs. High ISO: Lower ISO values (e.g., 100) are ideal for well-lit environments, providing sharper and less noisy images. Higher ISO settings (e.g., 1600 or above) help compensate for low-light situations but may introduce some unwanted noise.
- Trade-off between Noise and Brightness: While increasing the ISO brightens your image, it simultaneously adds noise or grainy texture to it. Balancing these two factors is crucial for achieving desired results.
- ISO Settings Variation: Modern cameras offer a range of customizable options for adjusting ISO settings manually or using automatic modes like Auto-ISO.
Consider this example table showcasing different lighting scenarios alongside corresponding recommended ISO settings:
| Lighting Scenario | Recommended ISO Setting |
|---|---|
| Outdoor daylight | 100 |
| Well-lit indoor venue | 400 |
| Dimly lit club | 1600 |
| Nighttime concert | 3200 |
By understanding aperture and now exploring the role of ISO in photography, you are equipped with the knowledge to capture exceptional images in various lighting conditions. Next, we will demystify shutter speed and its impact on your photographs, further enhancing your ability to freeze those captivating moments in time.
Demystifying Shutter Speed
Building on our understanding of ISO and its role in photography, let’s now explore another crucial camera setting that greatly influences the outcome of your music photographs – shutter speed.
Shutter speed determines how long the camera’s sensor is exposed to light when capturing an image. It affects both motion blur and exposure. For instance, imagine you are photographing a live concert where the musicians are energetically moving around the stage. A slow shutter speed might result in blurred images due to the subject’s movement during the exposure time, while a fast shutter speed can freeze their actions mid-performance.
To better comprehend the significance of shutter speed in music photography, consider this scenario: You’re photographing a guitarist strumming his instrument with passion and intensity. To convey the energy of the performance, you opt for a slower shutter speed of 1/30th of a second. This allows some intentional motion blur in the guitarist’s hands as he moves swiftly across the strings, creating a dynamic visual effect that amplifies the emotion captured within each frame.
Understanding how shutter speed impacts your music photographs is essential for achieving desired artistic results. Here are key points to keep in mind:
-
Fast Shutter Speed:
- Freezes action
- Captures sharp details even in fast-paced performances
- Ideal for freezing moments like drumstick hits or high-energy jumps
-
Slow Shutter Speed:
- Creates intentional motion blur
- Conveys a sense of dynamism and movement
- Suitable for portraying fluidity during guitar solos or expressive dance movements
To further illustrate these differences and help you choose appropriate settings, refer to the table below which compares fast and slow shutter speeds:
| Fast Shutter Speed | Slow Shutter Speed | |
|---|---|---|
| Use | Freezing action | Creating motion blur |
| Effect | Sharp detail capture | Conveying dynamism |
| Example | Drummer’s stick hits | Guitarist strumming with emotion |
Incorporating the right shutter speed in your music photography allows you to effectively capture and communicate the energy and movement inherent in live performances. By carefully selecting between fast or slow settings, you can produce images that resonate with viewers on an emotional level.
Now that we have explored the role of shutter speed, let’s delve into another crucial aspect of camera settings – mastering white balance.
Mastering White Balance
Understanding the concept of shutter speed is crucial for music photographers seeking to capture dynamic and captivating images. Shutter speed refers to the length of time that the camera’s shutter remains open, allowing light to enter and expose the image sensor. Different shutter speeds can produce varying effects on a photograph, making it an essential element in controlling motion blur and capturing sharpness.
To illustrate this point, imagine you are photographing a live concert where the lead singer jumps mid-air while performing. By using a fast shutter speed, such as 1/1000th of a second or faster, you can freeze their movement in crystal-clear detail. This not only showcases their energy but also allows viewers to appreciate the intensity of the performance.
When considering which shutter speed to use, here are some factors to keep in mind:
- Subject Motion: If your subject is moving quickly, opt for a faster shutter speed to freeze action effectively.
- Desired Effect: Experiment with slower shutter speeds (around 1/30th of a second or slower) for intentional motion blur or creative long exposures.
- Lighting Conditions: In low-light environments, longer exposure times may be necessary to gather enough light, but beware of potential blurring caused by shaky hands or subject movement.
- Lens Stabilization: Some lenses have built-in stabilization systems that allow you to shoot at slower shutter speeds without compromising image quality. Consider utilizing this feature when appropriate.
Incorporating these considerations into your photography workflow will help you master the art of capturing unforgettable moments during live performances. Understanding how different shutter speeds affect your images empowers you to control the visual narrative and convey emotions through your photographs.
Transitioning seamlessly from demystifying shutter speed leads us straight into our next topic: mastering white balance. Achieving accurate colors in your shots is crucial for delivering professional-grade results.
Getting the Perfect Exposure
Mastering White Balance is an essential skill for music photographers to ensure accurate and consistent color reproduction in their images. By understanding how white balance works and making appropriate adjustments, photographers can enhance the mood and atmosphere of their concert photos.
For example, imagine you are photographing a rock band performing on stage with vibrant lighting effects. If your camera’s white balance setting is set to Auto, it may struggle to accurately capture the colors due to the constantly changing lights. However, by manually adjusting the white balance according to the lighting conditions or using a custom preset, you can achieve more pleasing and realistic results.
To help you master white balance in music photography, here are some key tips:
- Understand Color Temperature: Different light sources have varying color temperatures measured in Kelvin (K). For instance, daylight has a higher color temperature than tungsten bulbs, resulting in cooler blue tones versus warmer orange tones respectively. Familiarize yourself with common color temperatures to adjust your camera settings accordingly.
- Use Presets or Custom White Balance: Many cameras offer built-in presets such as Daylight, Cloudy, Shade, Tungsten, Fluorescent, etc., designed to match different lighting conditions. Experiment with these presets or create a custom white balance based on a neutral gray reference point for even better accuracy.
- Shoot Raw Files: Shooting in raw format allows greater flexibility when adjusting white balance during post-processing since raw files retain more information compared to compressed JPEGs.
- Consider Creative Effects: While accurate color reproduction is important, don’t be afraid to experiment with creative effects through intentional manipulation of white balance. For example, deliberately warming up or cooling down the image can add an artistic touch that complements the mood of live performances.
Incorporating various techniques mentioned above will enable you to unleash your creativity while maintaining control over the color rendering of your concert photographs.
Below is a table summarizing popular color temperatures and their corresponding characteristics:
| Color Temperature (K) | Characteristics |
|---|---|
| 2000-3000 | Warm, candlelight-like |
| 4000-5000 | Neutral, daylight |
| 5500-6500 | Cool, overcast sky |
| 7000+ | Cold, deep shade or cloudy |
Using Exposure Compensation Effectively is another crucial aspect of capturing the perfect concert moments. By understanding how exposure compensation works and making appropriate adjustments, photographers can ensure their images are neither too bright nor too dark.
Transition into the next section: Now that you have mastered white balance in music photography, let’s delve into using exposure compensation effectively to capture those unforgettable live performances.
Using Exposure Compensation Effectively
Transitioning from the previous section on getting the perfect exposure, let’s now delve into using exposure compensation effectively. To illustrate this concept, consider a music photographer who is shooting a live concert and encounters a challenging lighting situation. The stage lighting changes frequently throughout the performance, making it difficult to achieve consistent exposures for each shot. In such cases, understanding and utilizing exposure compensation can be instrumental in capturing stunning photographs.
Exposure compensation allows photographers to manually adjust the camera settings to either brighten or darken an image beyond what the camera’s metering system suggests. By applying positive or negative values of exposure compensation, photographers can override their camera’s automatic settings and achieve their desired level of brightness or darkness in a photograph.
To use exposure compensation effectively as a music photographer, keep these key points in mind:
- Understand your camera’s exposure compensation range: Familiarize yourself with how far you can push or pull your camera’s exposure settings without compromising image quality.
- Take test shots: Experiment with different levels of exposure compensation during practice sessions before shooting important events. This will help you determine how much adjustment is needed in various lighting conditions.
- Evaluate histograms: Pay attention to the histogram displayed on your camera’s LCD screen when reviewing images. A well-distributed histogram indicates a properly exposed photograph.
- Be mindful of highlight and shadow details: Adjusting exposure compensation can affect both highlights and shadows in an image. Consider whether preserving details in these areas is crucial for conveying the mood and atmosphere of a particular moment.
Here are four reasons why mastering exposure compensation is vital for music photographers:
- Achieve consistent results despite changing lighting conditions
- Enhance creative control by intentionally overexposing or underexposing certain elements
- Capture dynamic performances accurately by balancing bright stage lights and dark backgrounds
- Minimize post-processing work by nailing the correct exposure in-camera
Incorporating table:
| Lighting Situation | Recommended Exposure Compensation |
|---|---|
| Bright stage lights | -1/3 to -2/3 EV |
| Low light conditions | +1/3 to +2/3 EV |
| Backlit subjects | +1/2 to +1 EV |
| Mixed lighting sources | 0 EV |
By effectively using exposure compensation, music photographers can adapt to challenging lighting situations and capture stunning images that truly encapsulate the energy and atmosphere of live performances. In the subsequent section about choosing the right metering mode, we will explore another crucial aspect of camera settings that further enhances control over exposure.
Choosing the Right Metering Mode
Continuing our exploration of camera settings, we now delve into the intriguing world of aperture and its potential to create captivating visual effects. Imagine a scenario where you are photographing a live concert. By skillfully manipulating your camera’s aperture settings, you can achieve stunning results that not only capture the essence of the performance but also evoke powerful emotions in your audience.
To begin with, let us consider four key ways in which aperture can be utilized creatively:
-
Depth of Field Control: Adjusting the aperture allows you to control the depth of field in your photographs. A wide-open aperture (represented by a low f-number) creates a shallow depth of field, resulting in a blurred background while keeping the subject sharp and prominent. This technique is particularly effective when capturing intimate moments between musicians on stage or conveying a sense of focus on an individual performer amidst a crowded ensemble.
-
Bokeh Effect: Another fascinating aspect of using wider apertures is the ability to produce bokeh – those dreamy out-of-focus areas characterized by soft, glowing circles or shapes. This effect adds an ethereal quality to your images, enhancing their aesthetic appeal and drawing attention to specific elements within the frame.
-
Starbursts: When shooting with narrower apertures (higher f-numbers), such as during nighttime performances or when incorporating artificial light sources like stage spotlights, you can create starburst patterns around bright points of light. These starbursts add a touch of magic and drama to your images, elevating them from ordinary concert captures to visually striking compositions.
-
Silhouettes and Sunbursts: In certain situations where backlighting is present – whether it be natural sunlight streaming through windows onto performers or stage lighting casting strong shadows – adjusting your aperture appropriately can enable you to capture evocative silhouettes against vibrant backgrounds or even produce sunbursts bursting through gaps in the stage setup. These techniques can evoke a sense of mystery, intrigue, and drama in your music photography.
By skillfully utilizing aperture settings, you have the power to transform ordinary concert photographs into extraordinary works of art that resonate with viewers on an emotional level. In our next section, we will explore yet another crucial camera setting: shutter speed and its role in freezing or capturing motion effectively during live performances. So let’s dive into the captivating world of shutter speeds!
Utilizing Aperture for Creative Effects
As a music photographer, mastering the use of aperture can greatly enhance your creative vision and add depth to your images. By understanding how different aperture settings affect your photographs, you’ll be able to experiment with various effects and capture truly captivating moments. Let’s delve into the world of aperture and explore its potential in music photography.
Imagine you are photographing a live concert performance. The stage is bathed in vibrant colored lights, creating an electrifying atmosphere. To convey a sense of dynamism and movement, you decide to utilize a wide aperture setting, such as f/2.8 or even wider. This allows for a shallow depth of field, isolating your subject from the background clutter and drawing attention directly to them. As a result, your image will have a striking focus on the lead singer or guitarist while blurring out the crowd behind them.
To further demonstrate the impact of aperture on capturing creative effects in music photography, consider these key points:
- Bokeh: Widening the aperture not only separates subjects from their backgrounds but also produces pleasing bokeh – those beautifully blurred circles of light that add a dreamy quality to your images.
- Depth: Conversely, using narrower apertures like f/11 or f/16 can maximize depth-of-field, allowing you to keep both foreground performers and distant band members sharply in focus.
- Light transmission: Wide apertures enable more light to reach the camera sensor, which is especially advantageous when shooting under low-light conditions where every bit of extra brightness counts.
- Lens selection: Different lenses have varying maximum aperture capabilities; prime lenses often allow wider apertures compared to zoom lenses. Consider investing in fast prime lenses for greater control over creative effects.
By thoughtfully adjusting your aperture settings according to the desired effect and scene lighting conditions, you can elevate your music photography game substantially. Experimentation and practice will help you develop your own unique style, capturing moments that truly resonate with the viewer.
Transitioning into the subsequent section about optimizing ISO for low-light music photography, we shall explore another crucial aspect of achieving outstanding results in challenging lighting conditions.
Optimizing ISO for Low-Light Music Photography
Building upon the creative effects achieved through aperture control, let us now delve into another crucial camera setting for music photographers – optimizing ISO for low-light conditions. By understanding and effectively utilizing ISO settings, photographers can capture stunning images even in challenging lighting environments.
Imagine being at a live concert where the stage is bathed in dim atmospheric lighting, casting shadows on the performers as they energetically engage with their instruments. In such situations, having a good grasp of ISO settings becomes essential to ensure sharpness and minimize noise in your photographs. Let’s explore some key considerations when it comes to maximizing image quality while working with low-light scenarios.
Factors to consider:
- Sensitivity range: Modern cameras offer a wide range of ISO sensitivities, allowing you to adjust sensitivity levels based on available light. Experimenting with different ISO values enables you to strike a balance between capturing enough light without introducing excessive digital noise.
- Noise reduction techniques: Higher ISO settings tend to introduce more noise or graininess in images. To counter this, most cameras provide options for noise reduction algorithms that help maintain image quality by minimizing unwanted artifacts caused by high ISO.
- Use of tripod or stabilization tools: When shooting in low light conditions, longer exposure times may be necessary to compensate for reduced ambient light. Using a sturdy tripod or other stabilization devices helps eliminate camera shake during longer exposures, resulting in sharper images even at higher ISOs.
- Post-processing adjustments: While striving for optimal results straight out of the camera is important, post-processing software offers further opportunities to fine-tune your images. Utilize noise reduction features selectively during editing processes to preserve details while reducing any residual noise from high ISO captures.
| Key Considerations |
|---|
| Wide sensitivity range |
| Noise reduction techniques |
| Stability through tripods/stabilization tools |
| Strategic post-processing |
By carefully considering ISO settings, photographers can overcome the challenges posed by low-light environments and capture compelling music photographs. The ability to adjust sensitivity levels, employ noise reduction techniques, stabilize shots during longer exposures, and leverage post-processing tools ensures that you achieve remarkable results even in challenging lighting conditions.
Understanding how ISO impacts image quality sets a strong foundation for capturing exceptional music photos. Now let’s explore yet another vital aspect – the impact of shutter speed on freezing motion and adding artistic effects to your compositions.
The Impact of Shutter Speed on Music Photos
Having discussed the significance of optimizing ISO settings in low-light music photography, let us now turn our attention to another crucial factor that greatly influences the outcome of your shots – shutter speed. By understanding how different shutter speeds impact music photos, photographers can capture dynamic moments with precision and clarity.
Shutter Speed and its Impact:
One example where an appropriate choice of shutter speed becomes essential is when capturing a guitarist performing a fast-paced solo on stage. To freeze every intricate movement of their fingers while maintaining overall sharpness, a high shutter speed such as 1/1000th of a second or faster would be ideal. On the other hand, if you wish to convey motion blur intentionally during a drummer’s energetic performance, using a slower shutter speed like 1/60th of a second might result in captivating images that emphasize the artist’s dynamism.
To better understand how various shutter speeds affect music photographs, consider these key points:
-
Fast Shutter Speeds (e.g., 1/500th sec or higher):
- Ideal for freezing action and capturing crisp details.
- Suitable for photographing artists who move quickly or perform acrobatic stunts on stage.
- Allows for precise timing to capture specific moments within a performance.
- May require higher ISO or wider aperture settings due to reduced exposure time.
-
Slow Shutter Speeds (e.g., 1/30th sec or lower):
- Creates intentional motion blur that adds energy and excitement to images.
- Best utilized when trying to convey the sense of movement during performances involving dancing or jumping musicians.
- Requires careful stabilization techniques like tripods or monopods to avoid unwanted camera shake.
- Can contribute to more challenging focusing situations due to longer exposure times.
Table: Comparison of Shutter Speed Effects
| Shutter Speed | Effect |
|---|---|
| Fast (1/500th+) | Freezes action and captures crisp details |
| Ideal for capturing quick movements | |
| Slow (<1/30th) | Creates intentional motion blur |
| Adds energy and dynamism to the photographs |
Understanding how shutter speed impacts music photography allows photographers to adapt their settings based on the desired visual outcome. In our next section, we will explore another crucial aspect of camera settings – white balance tips for vibrant concert shots.
White Balance Tips for Vibrant Concert Shots
Transitioning from the previous section, let us delve into another critical aspect of camera settings for music photographers: shutter speed. To understand its impact on capturing captivating concert shots, consider this hypothetical scenario:
Imagine you are photographing a fast-paced rock concert with energetic performers jumping and dancing across the stage. With a slow shutter speed, such as 1/60th of a second, your images may end up blurry due to motion blur caused by the movement onstage. However, by increasing the shutter speed to around 1/250th or faster, you can freeze the action and capture sharp images that showcase the dynamic energy of the performance.
Here are some key points to keep in mind regarding shutter speed when shooting music photos:
- Faster shutter speeds (e.g., 1/500th of a second) are ideal for freezing fast movements like guitar strums or drum hits.
- Slower shutter speeds (e.g., 1/30th of a second) can be used creatively to convey motion blur and emphasize the dynamism of certain performances.
- Adjusting ISO sensitivity can help maintain image quality while using faster shutter speeds in low-light environments.
- Experimentation is crucial; feel free to try different shutter speeds during a show to find what works best for each specific moment.
To further illustrate these concepts visually, below is an example table showcasing how different shutter speeds affect the outcome of music photographs:
| Shutter Speed | Effect |
|---|---|
| 1/1000 | Freezes all movement, producing crisp images |
| 1/250 | Captures most actions sharply but allows slight motion blur |
| 1/60 | Significant motion blur present, emphasizing dynamic movement |
By understanding the role of shutter speed and exploring its various possibilities during live performances, music photographers can effectively convey both stillness and motion, enhancing the visual impact of their images. So, remember to experiment with different settings and adapt them according to the energy and pace of each musical moment—a well-crafted photograph can encapsulate a captivating performance for years to come.